|
|
|
|
|
|
|
|

The process of wine making is quite simple, yet is not for the impatient people. Remember, it takes lot of time to make quality wine. It could be months together before you can enjoy self-made wine.
Let me give you a step by step process to make a simple homemade grape wine. Before you get into the serious business of making wine, you need to purchase few wine making equipments and homemade wine ingredients
Let me list out the equipments for you. You can find them at any winemaking stores.
1. Plastic Fermentation Container with a lid. May be a 4-gallon one will do.
2. 4 or 5 one gallon glass jugs.
3. Bung - Rubber corks for the glass jugs
4. Airlock.
5. Mesh Straining bag
6. 8 feet of half inch clear plastic tube
7. Bottles to store your wine
8. Cork to fit the above wine bottles
9. Hand Corker
10. Brix Hydrometer to measure sugar content.
Now, let me list out the wine ingredients. Don’t forget to pick them up along with the wine equipments.
1. Wine yeast
2. Grape tannin
3. Pectic enzyme
4. Campden tablets
5. Yeast nutrient
6. Acid blend
You are already a Wine Maker. Now, let me tell you how to actually brew your cheap homemade wine.
Before you embark on step-by-step wine making act, grab a grape wine recipe from Internet. To begin with, stick to a simple wine recipe.
1.
Choose the grapes. Inspect the grapes carefully by crushing couple of them between finger and tasting them. Test the juice with Hydrometer to check the level of sugar. If it is between 22 and 24 brix, it implies that the alcohol content of the wine will be between 10 to 12 percent.2.
Clean the grapes. Remove any rotten ones. Remove the stems and then wash the grapes intensively making sure that no insects or debris is left behind.3.
Never underestimate the importance of sanitizing. Clean all the equipments thoroughly before starting the process. Take pain to sterilize the equipments. Use detergent in hot water and soak the containers in it for a while.4.
Crush the grapes in accordance with the instruction provided in the recipe you have chosen. Depending on the recipes, the flavour extraction procedures differ. Mostly you would be required to crush, chop, soak, or boil to extract the flavour. After this process, pour the contents into the large 4-gallon container you bought.5.
Now we start blending the ingredients. You will be blending ingredients in right order as mentioned on the recipe. Usually you start by adding Camden tablet, a sulphide to prevent oxidation and growth of wild yeast meanwhile promoting the growth of cultured yeast. It is followed by Pectic enzyme to promote flavour and aroma in the wine. Then Tannin moves in to introduce bite to the wine.6.
Next, yeast comes into play. The yeast can be activated by following the directions on the packet that it came packed in. Drop the yeast preparation into the container.7.
Dissolve some sugar in hot water and pour it into the container after confirming that it has cooled down. I iterate, take care to confirm that it is really cool. You can use ice cubes around the sugar syrup container to hasten cooling the mixture and pour it into the container as soon as possible. This urgency is to prevent contamination setting in the main fermentation container due longer duration of exposure to air.8.
Once the additives are blended into the 4-gallon container, the fermentation process starts. You need to cover the container’s opening with a piece of cloth with a rubber band around it and let the container stand for 5 to 10 days.9.
After the standing time, you can transfer the content to the 1-gallon containers. You need to stain the pulp from the liquid and pour the liquid alone, using a funnel, into the 1-gallon containers. Then close the containers with the airlock that you purchased. Leave the container at room temperature not exposed to direct sunlight standing for 2 to 3 weeks.10.
Now use the tube to transfer the liquid alone from the 1-gallon containers into the bottles without disturbing the sediments at the bottom. Ensure to leave the sediments at the bottom as it is.11.
Now cork the bottle and leave it standing upright for 3 to 4 days followed by 3 months of storage on its side.12.
You can extend or reduce the standing time according to the wine variety.13.
Finally, pour some wine and enjoy with family and friends.If you enjoyed the article, leave your esteemed comment and certainly do subscribe to the blog’s RSS feed by clicking on the RSS feed button at the top right hand corner of this page.
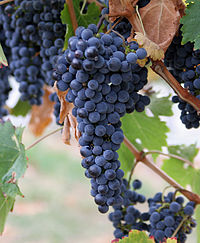
Image via Wikipedia


1 comments:
Making home made wine, and growing your own grape sure is the best idea. Great concept in your article. Keep it up! For more about grapes and grape growing, you should consider this: http://goinggrapes.com/
Post a Comment